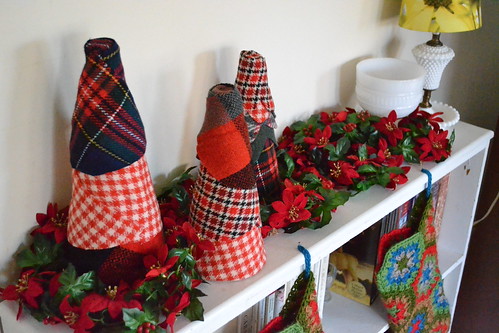
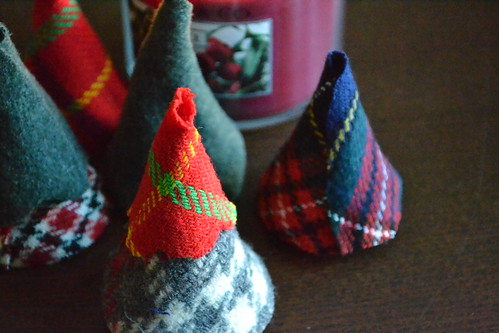
Here's a great last-minute decoration - Fabric Christmas Trees!
I wanted to make these last Christmas, after seeing a ton of cute tutorials floating around blogland, but it took me a whole year to get my butt in gear. I finally rounded up my materials and put together a little tutorial so you could make some, too.
Materials:
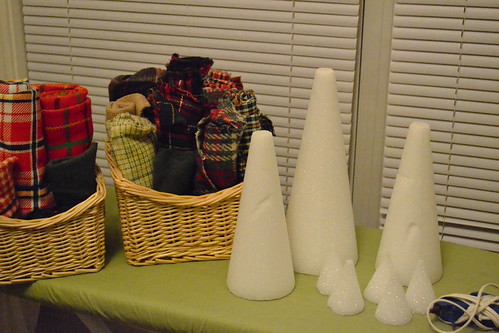
1. Fabric - I used wool flannels*
2. Felt for the bottom of the trees
3. Styrofoam cones - they sell these at crafty stores (Joann's, Michaels, etc)
4. Glue gun
5. Scissors
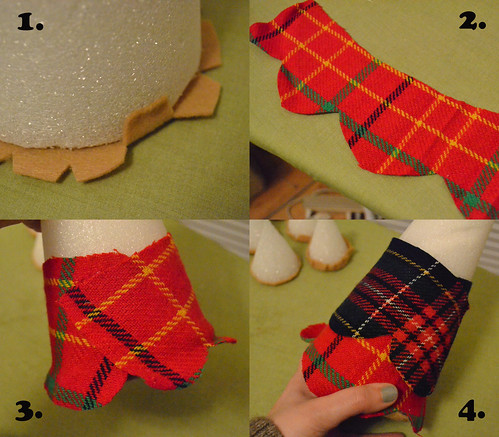
1. Trace the bottom of the trees onto the felt, and cut a circle about a half inch bigger than the bottom of the tree. Glue the felt circle to the bottom of the tree, cutting notches as needed so you can glue the felt to the sides of the cone.
2. Cut pieces of fabric for the sides of the tree. I used 3-5 pieces of fabric for each tree. Some can be scalloped, some can be straight. Experiment and use the sizes and shapes you like. I let the edges of my fabric fray a bit, so they look rustic.
3. Securely wrap the fabric around the cone and glue in place with just one little dot of glue in the corner - that's all you need!
4. Continue adding pieces of fabric, overlapping the other pieces, and gluing in place.
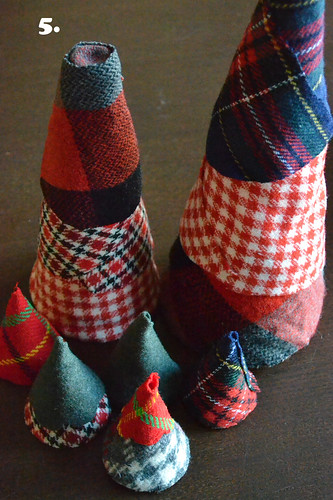
5. Before you wrap the final piece of fabric, glue a matching circle of fabric to the top of the cone. Wrap and glue the final piece of fabric, overlapping the top circle.
I made mini trees, too, using just one or two pieces of fabric. They make the perfect display with my crochet stockings!
*A funny story about this fabric - my best friend from high school gave me a huge bag of vintage flannel that belonged to his grandmother. Some are just pieces of fabric, but some are parts of pants or skirts, all from the 1960's-70's. He gave this to me about 10 years ago, and I am just now using this amazing fabric!

No comments :
Post a Comment
Comments make me happy! Thank you, and look for your response here!